MrCocoNuat
Fixing the Nokia N800
What a blast from the past! The Nokia N line of “internet tablets” released around 2007 or so (who’s counting?) to become one of the internet-connected devices of all time. With a Linux-based OS named Maemo that still enjoys an active community to this day, this tablet was and still is a useful extensible platform for any activity that benefits from a stylus-tablet form factor.
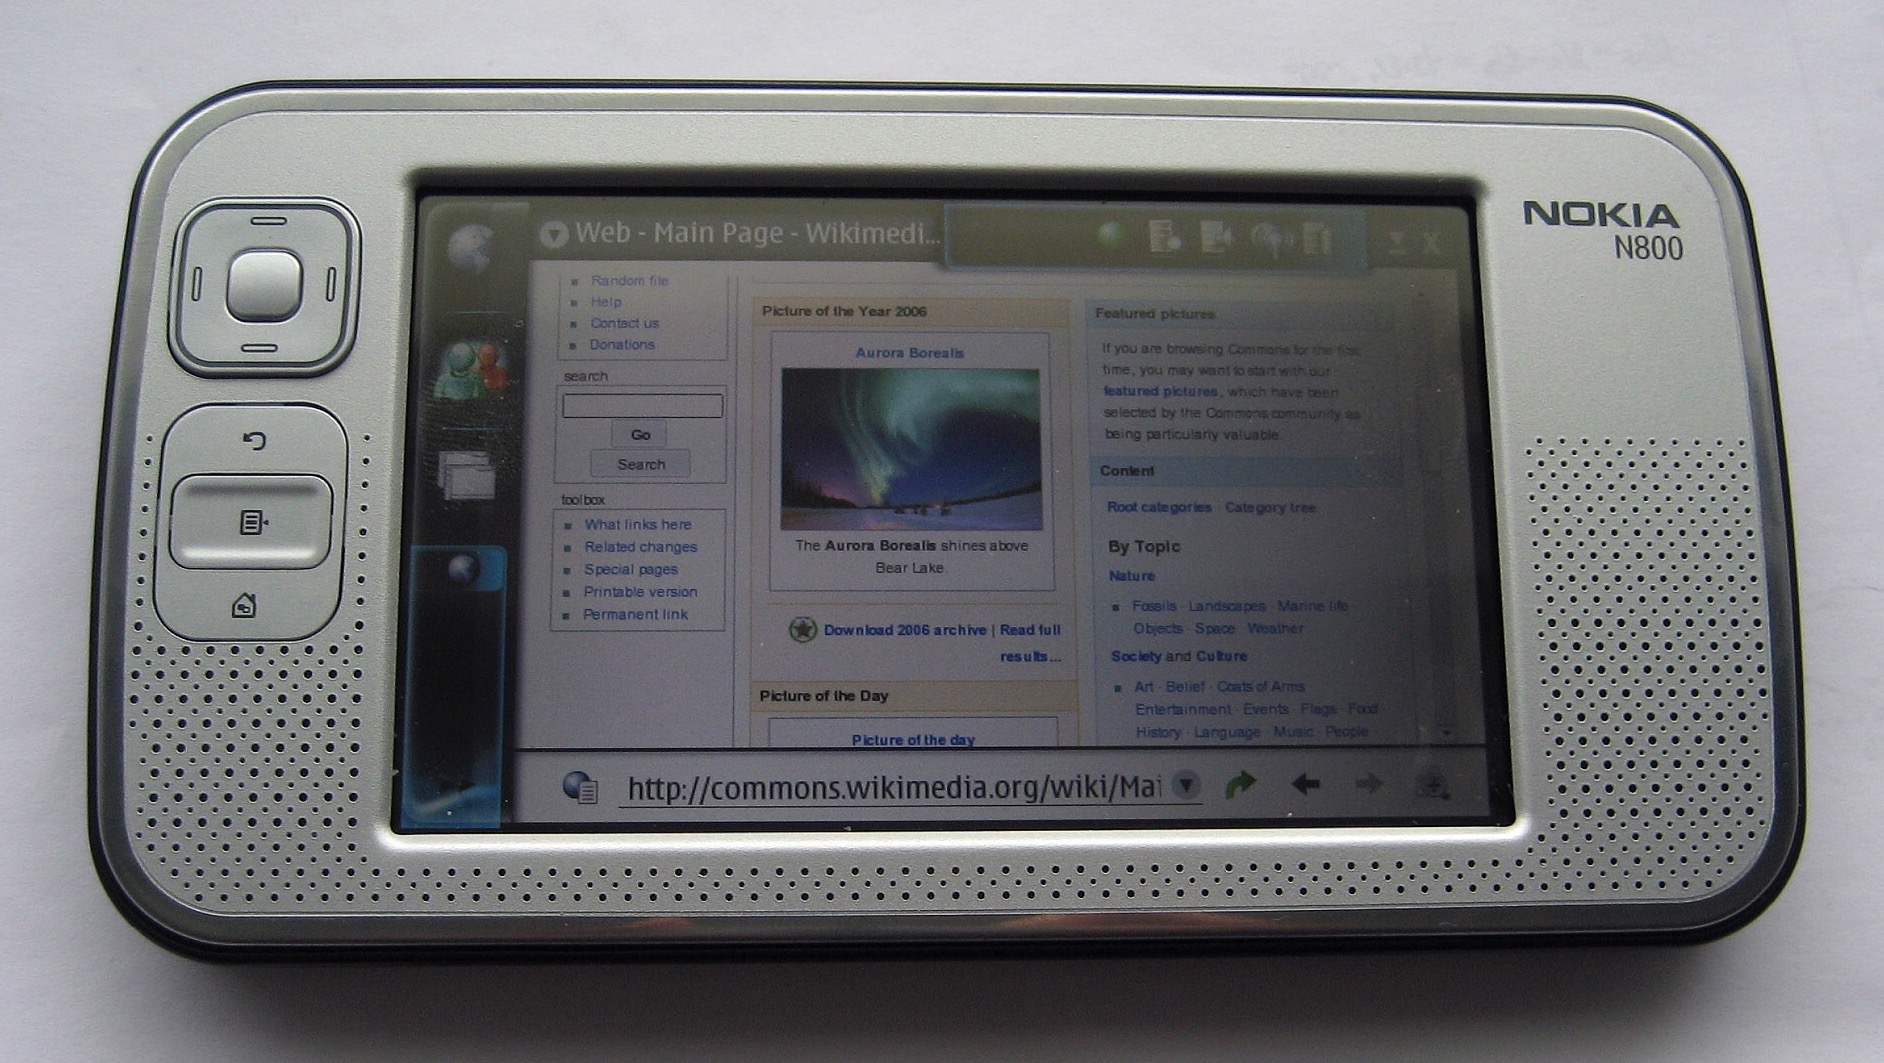
That being said, I would bet that most surviving N800s are in pretty rough shape - no lithium-ion battery can easily survive 15 years of even shelf life, and nothing can be guaranteed about any wearable flash inside the device. But we see the potential in such a device! Being the paragon of extracting maximum value out of every piece of technology, we here at LowTierTech will restore this tablet to its former glory - at least somewhat.
Disassembly
Mercifully, this device hails from an age before everything was glued together. Thus, T4 and T6 screwdrivers are all one really needs, along with this totally legitimately obtained manual from ManualsLib. Mind the display flex connectors!
Battery
The official battery that shipped with the device is the Nokia BP-5L. While an exact replacement would be ideal, Nokia does not seem to still manufacture these new, and lithium-ion cells are products that do not get better with age. Some shady second-source manufacturers from China seem to offer these, but frankly it’s not worth the trouble to ship them over if you already have lithium-ion cells lying around. Aything 1Ah or more compares favorably with the original 1.5Ah, keeping in mind the technological improvements in cycle life that 15 years brings.
The dimensional constraints of the internal battery box are 6*44*65mm, but the spring-loaded pogo contacts will cut into the 65mm figure a bit (unless you remove them).
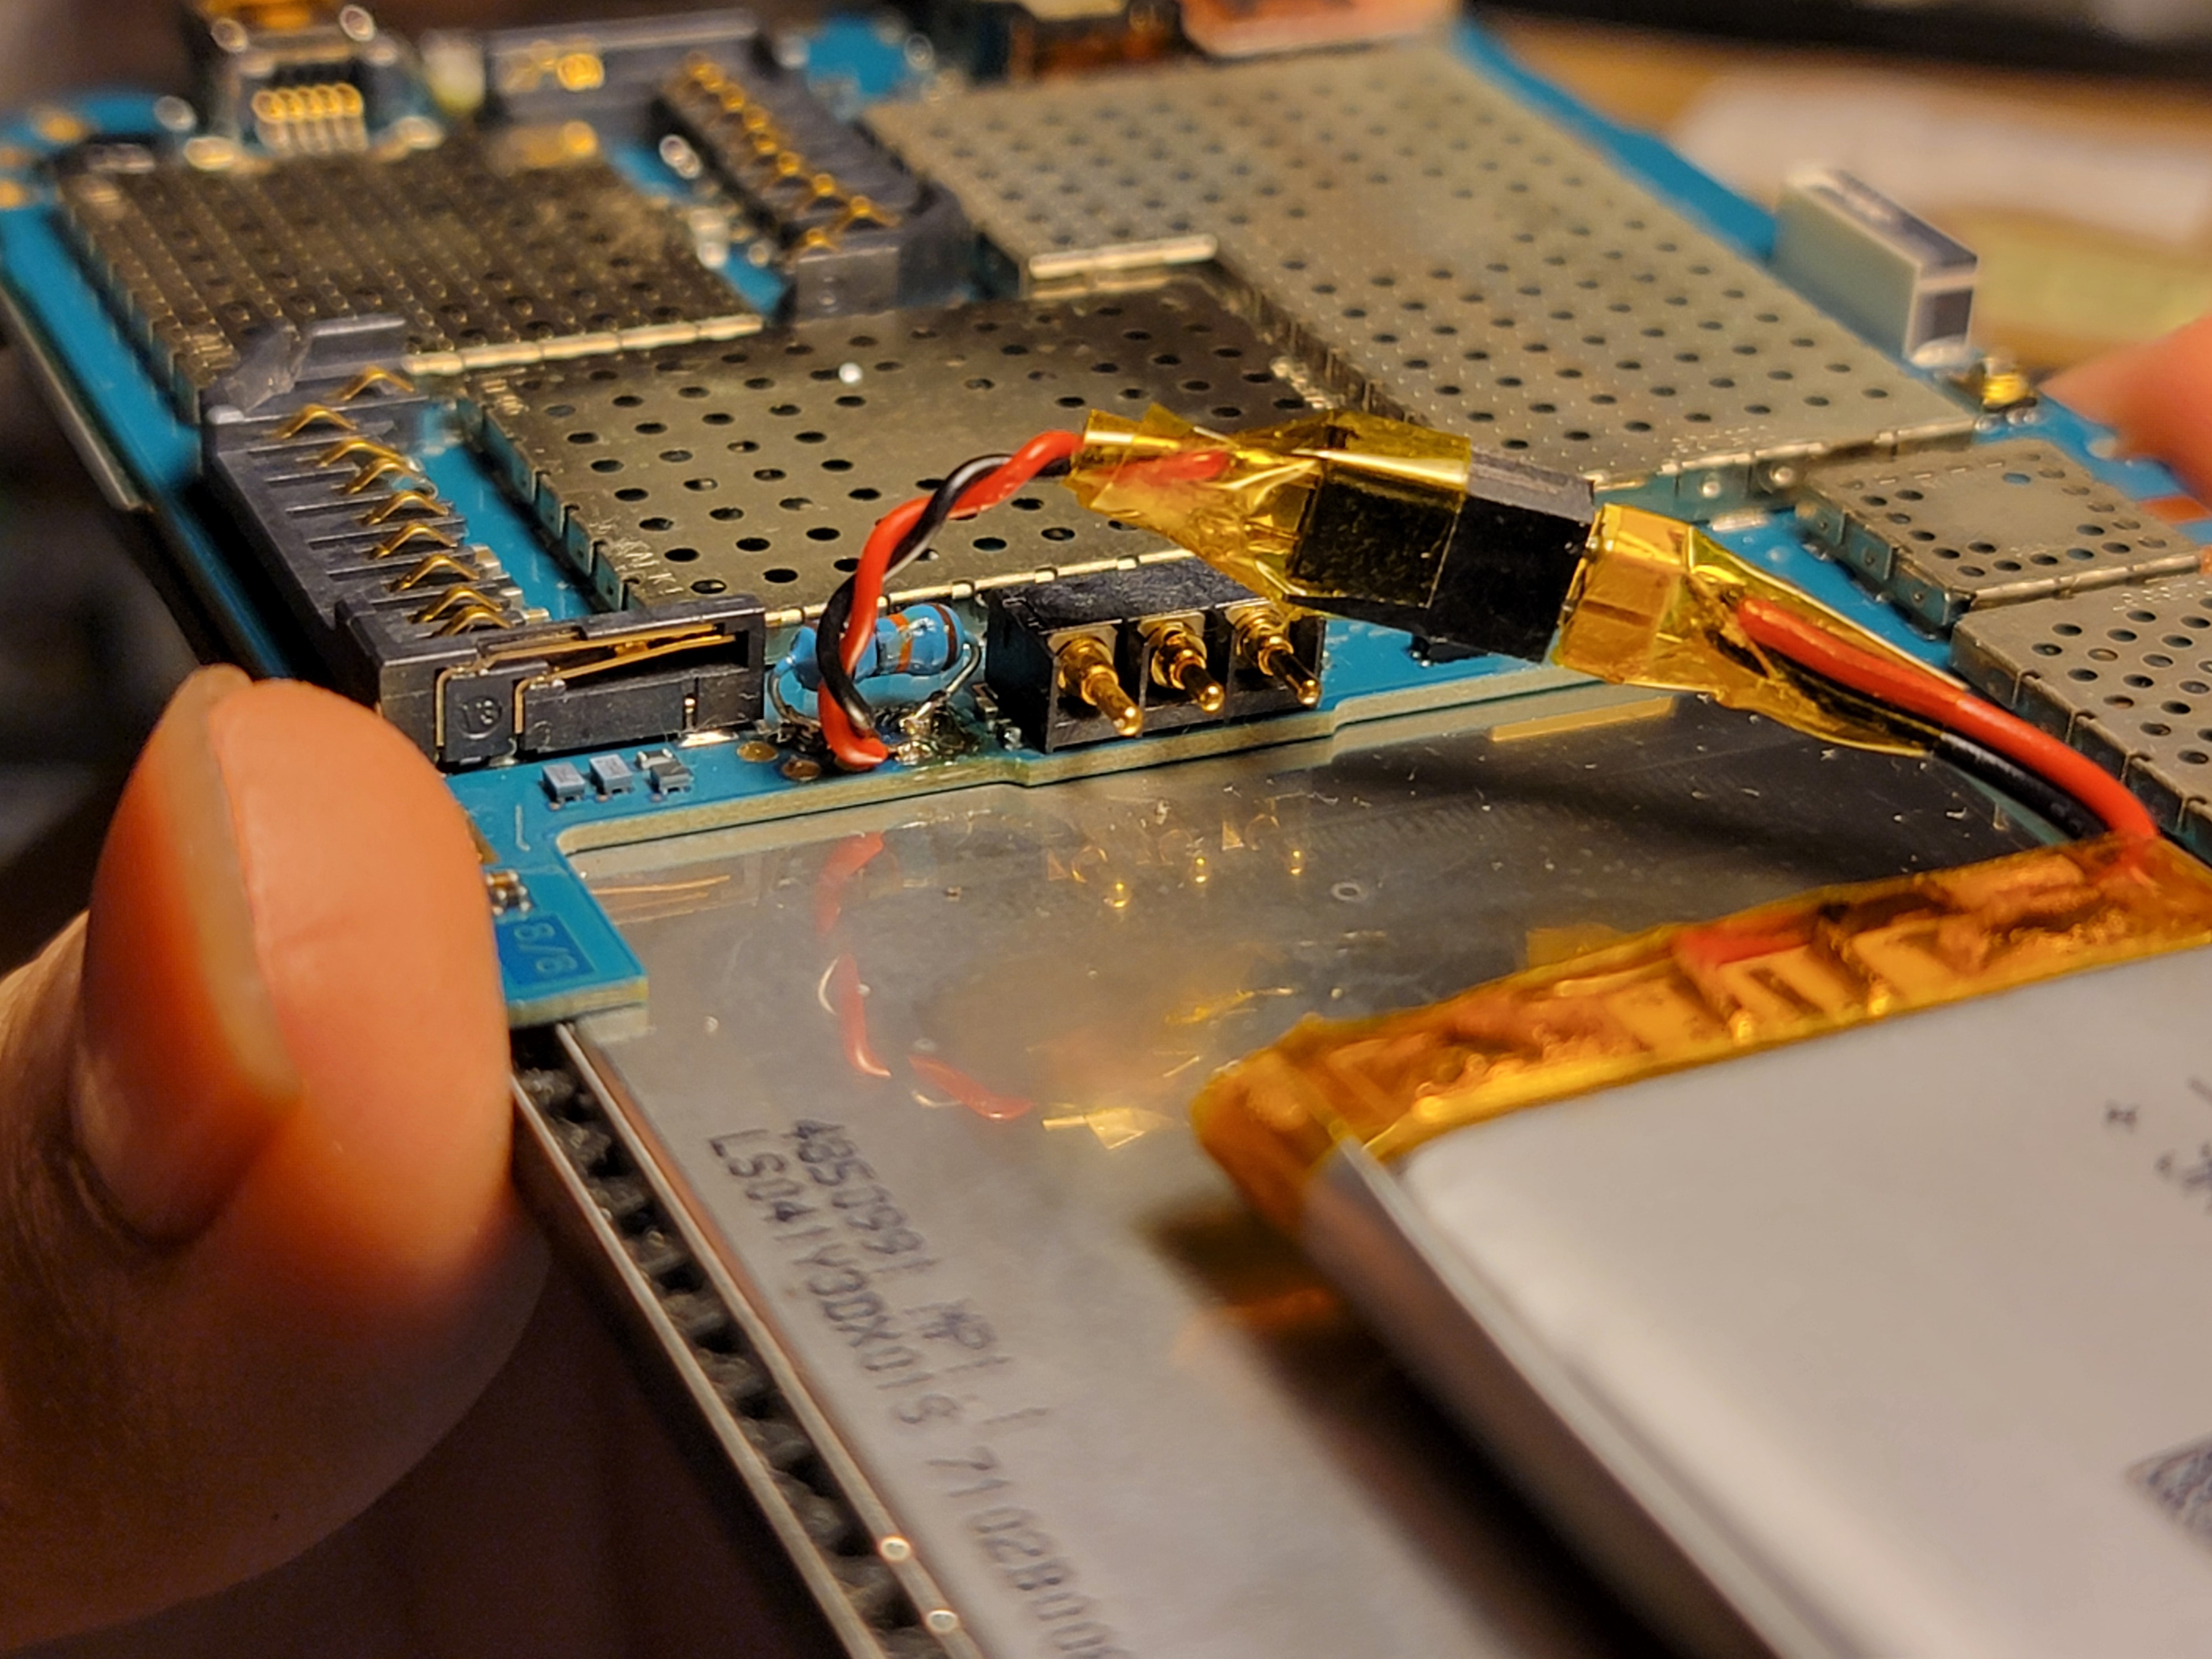
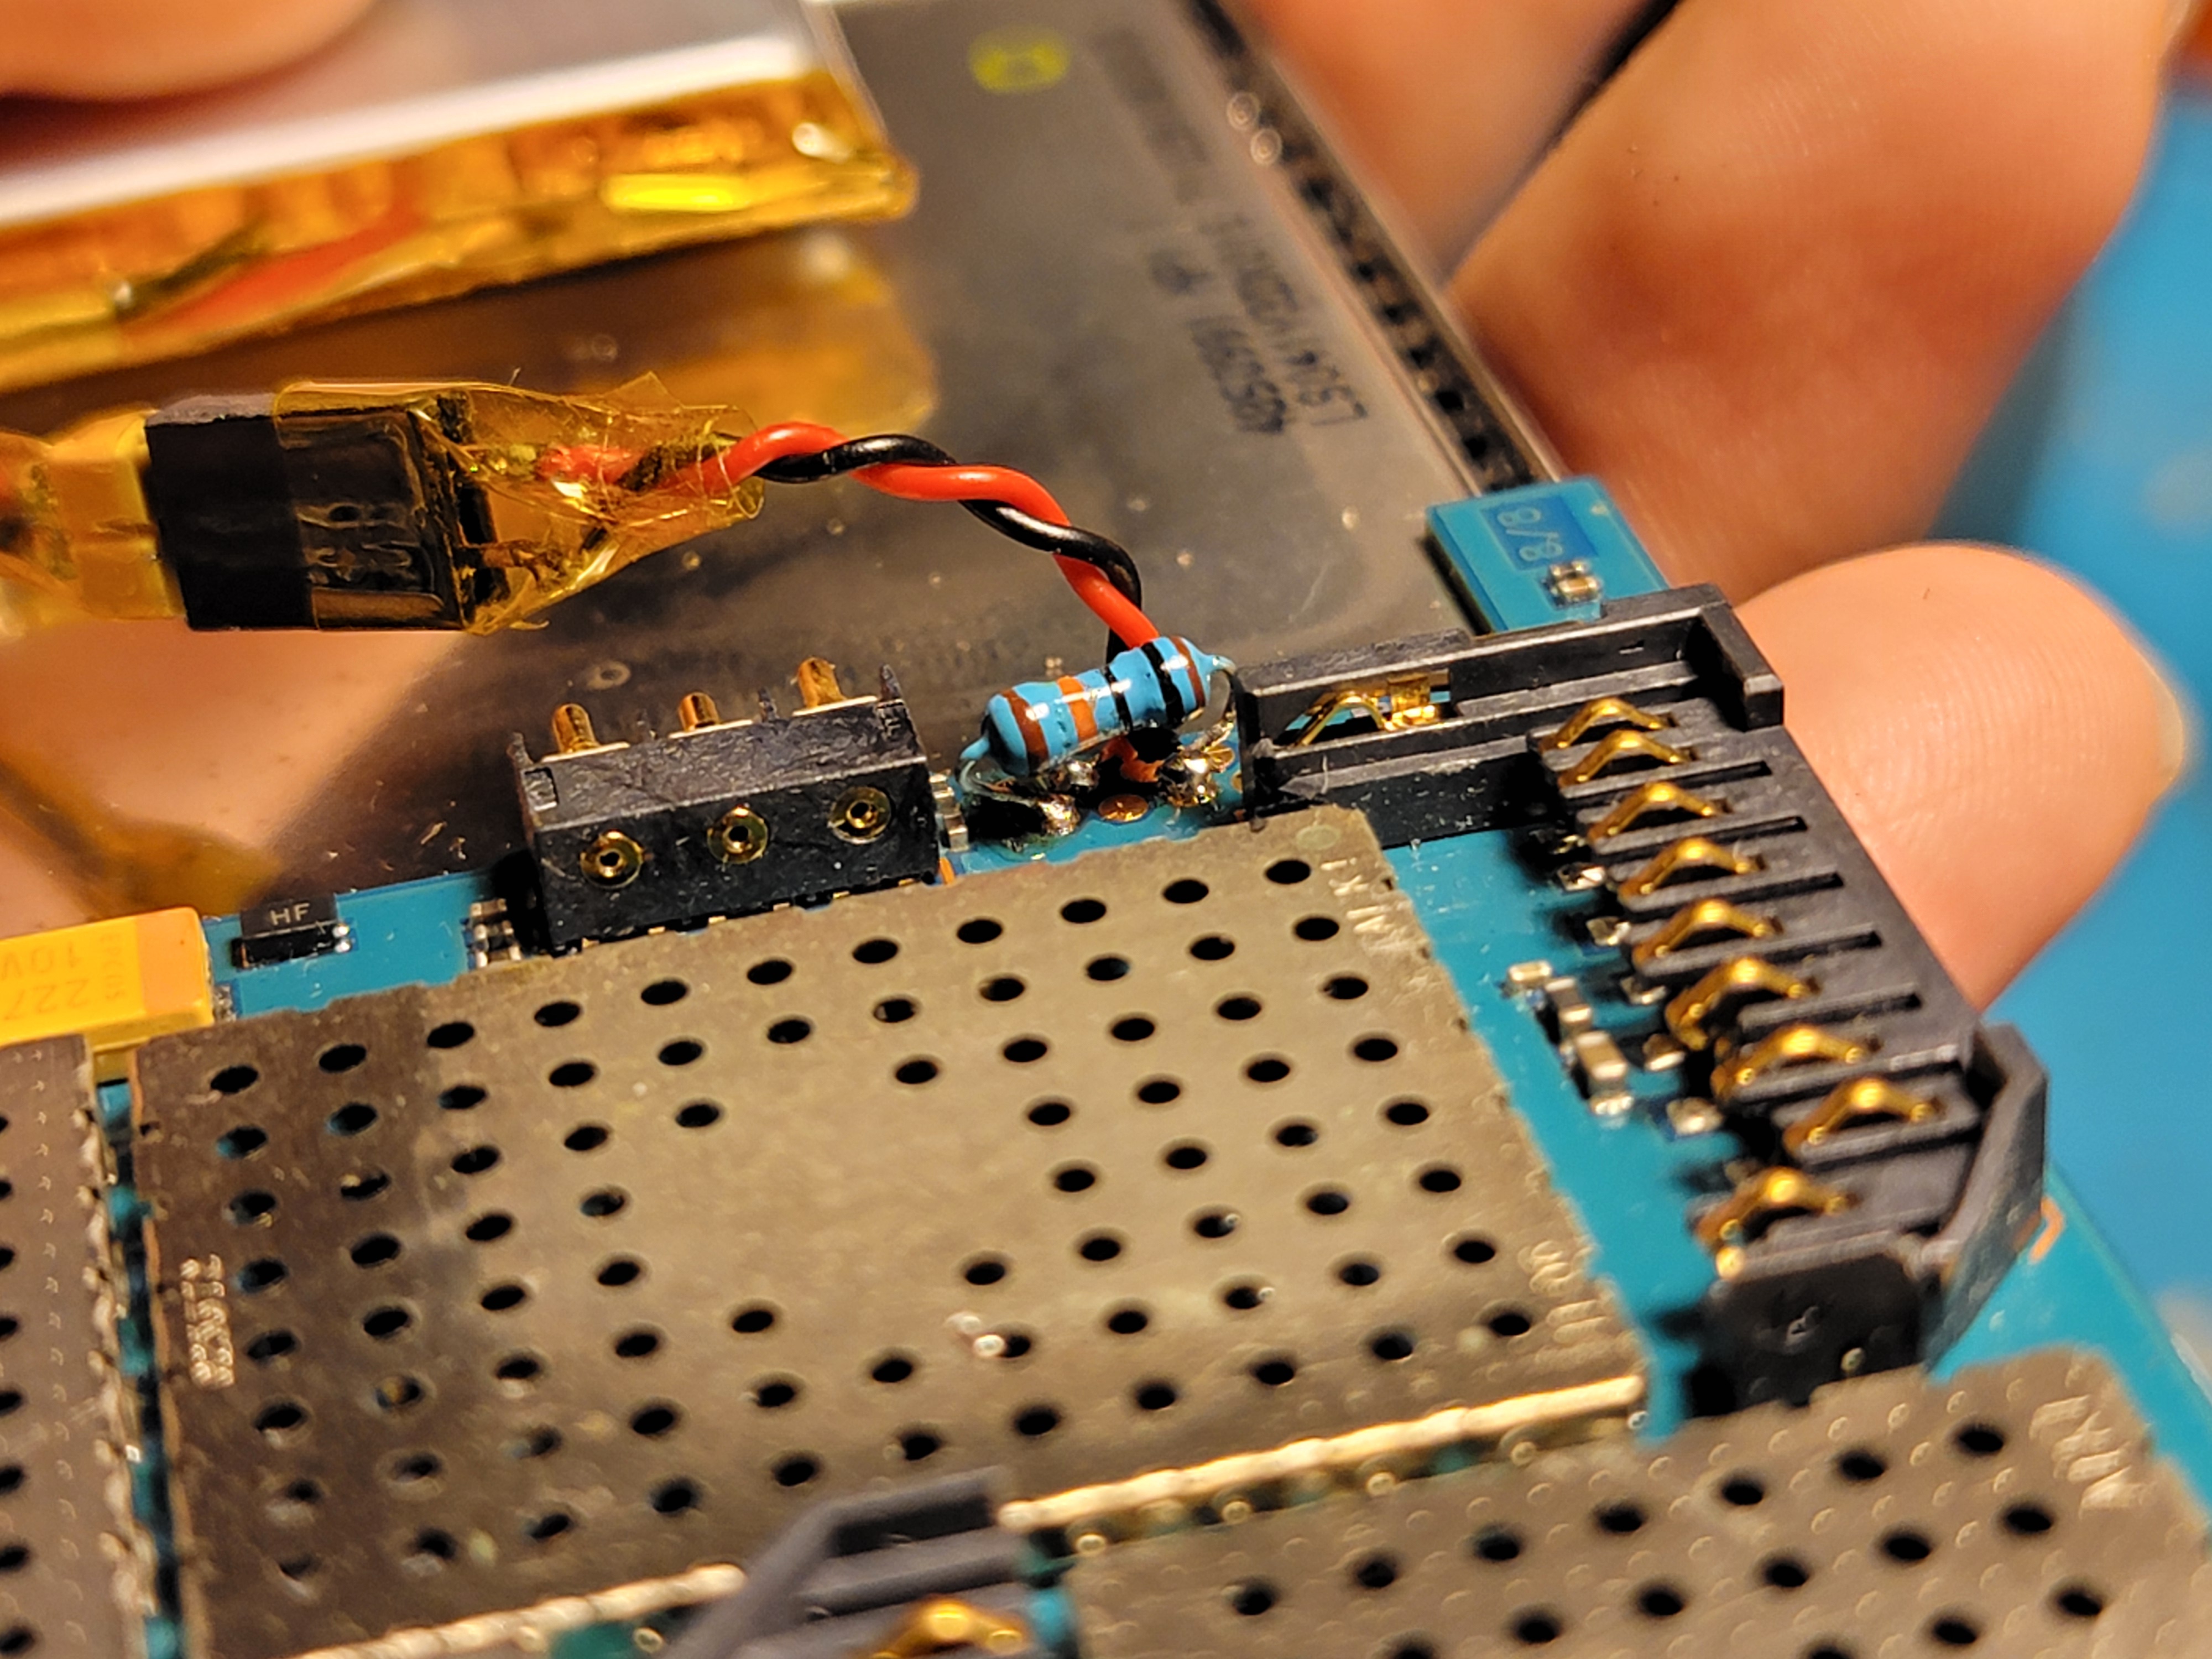
After that comes the issue of connecting the cell to the device. Using the original pogo contacts is an option if you can fabricate a frame for the cell that has the same contact pads as the BP-5L. If not, there is a convenient set of 7 diagnostic pads near the battery contacts that are directly connected and will admit a small connector and some thin wires.
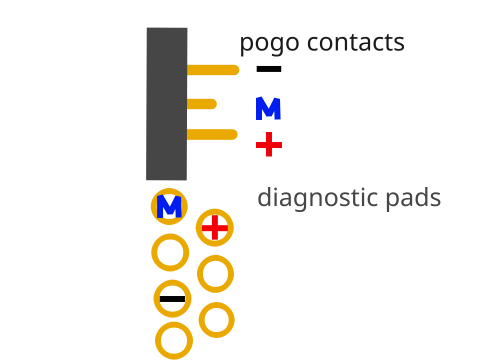
After hooking up the new battery, the device initially booted, then disappointingly immediately shut off. However, connecting the original BP-5L in parallel onto the pogo pins (only safe since it has so little capacity it doesn’t appreciably charge or discharge the new cell) fixed this issue! So something is up with the third M pin.
I detected a 120kΩ resistance between the BP-5L’s - and M pins. It did not appear to change with temperature, so probably it is meant as a signature to identify a real Nokia cell (like Apple either used to do or still does in their USB cables). In any case, hooking up a 100kΩ resistor between the corresponding diagnostic pads cleared this issue right up.
Update: It turns out that this 3rd pin is a resistance-lookup BSI, or battery size indicator, with my 100kΩ resistor signifying around 1250mAh. Ehh, close enough.
Charging
While the N800 narrowly missed the age of glue, it unfortunately did launch right in the age of proprietary charging connectors.
However, we are saved by the presence of a USB connector, although it is mini-B. No matter, since the charging adapter states an output of 5V 350mA, any USB will do just fine.
The modification here is straightforward, simply connecting USB V+ to the charging connector’s V+.
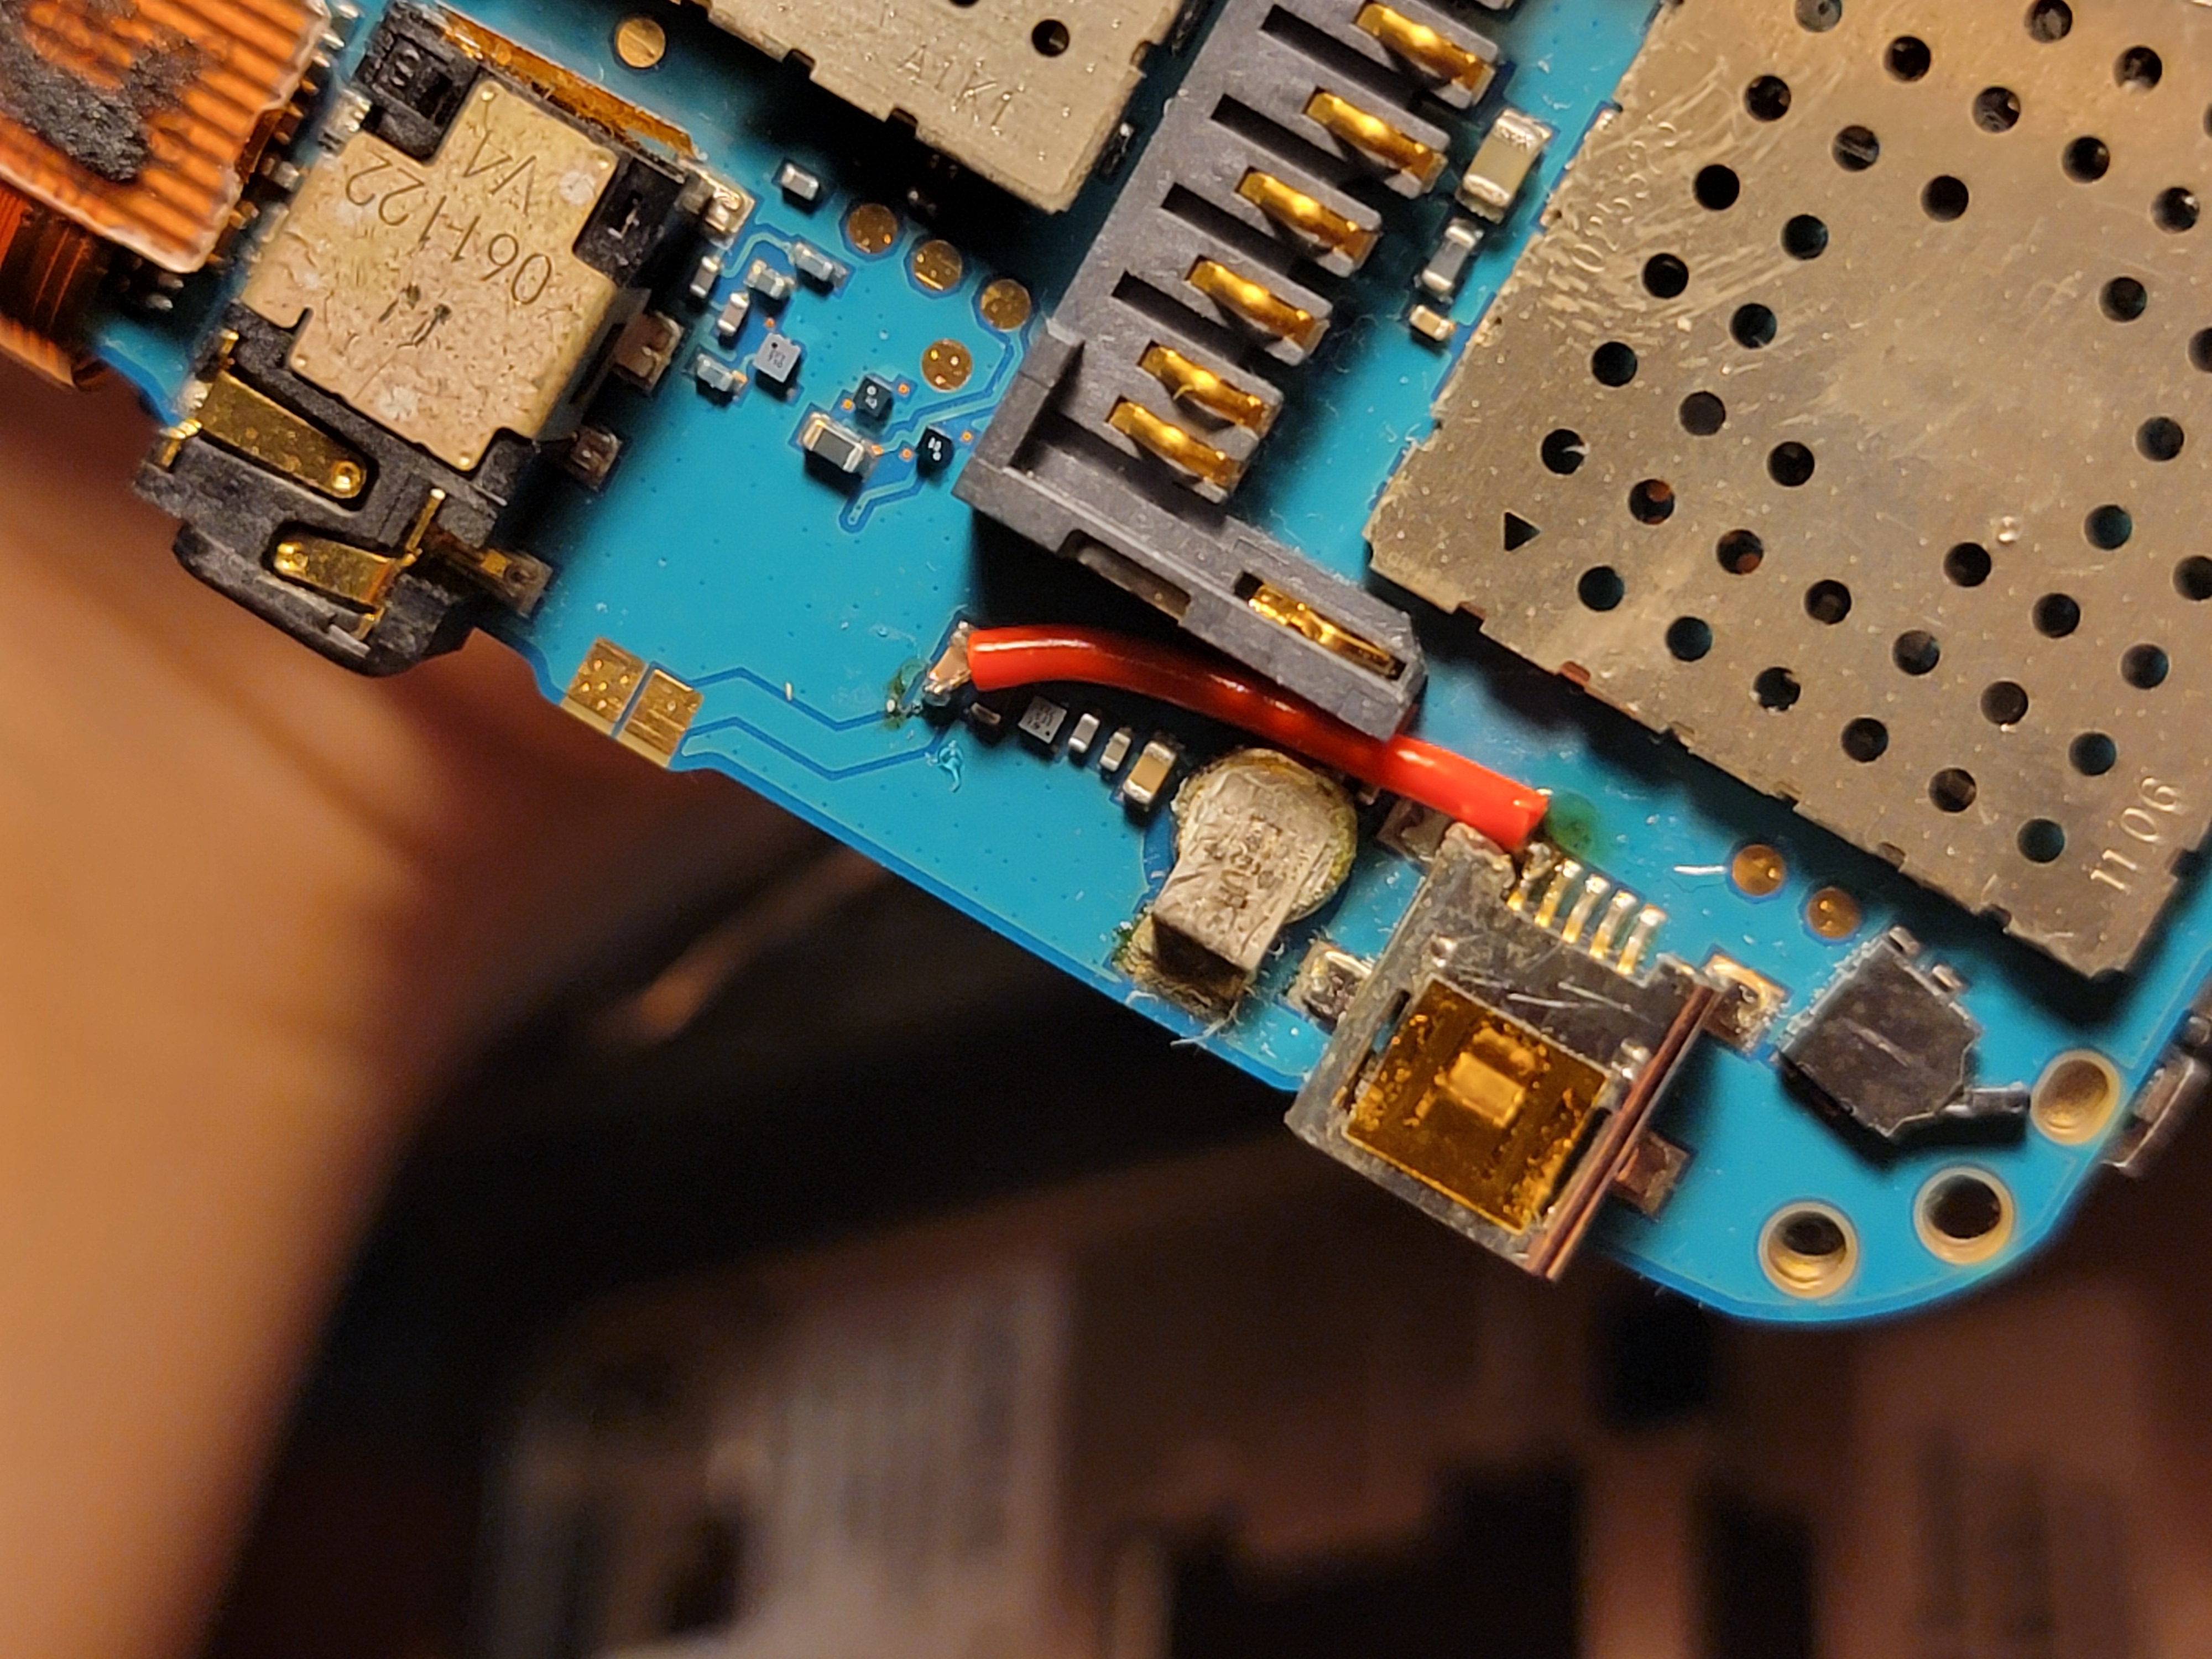
Do note that this might affect communication with the official software updater tool that instructs you to connect USB while also disconnecting the charge cable, but how many times are you going to need to update the OS on this thing?
“Internal” Memory - Advanced!
The N800 has, in addition to 256MB of integrated flash storage, 2 SD/MMC card slots - one is labeled internal, the other removable. For most of my living memory, the internal card slot has not functioned at all.
This being a board-level repair rather than a module-level one, I needed better information: the service schematic diagrams downloaded from ElektroTanya, were wonderfully comprehensive.
Initial web searches on maemo.org for "internal memory card sd not detected recognized" came up with promising results - it seemed that the most common failure mode was the back cover losing its adhesived magnet.
An explanation: The N800’s internal card slot is inaccessible and protected when the back cover is attached, this way the device can detect when it is safe to write to the card as there is no chance of the user removing it. The magnet itself is sensed by a Hall Effect sensor on the mainboard through a cutout in the back metal cover (a similar in concept but mechanical mechanism backs the removable card’s door).
Unfortunately, I realized that my back cover was still equipped with a magnet, and Hall effect sensor looked fine outwardly. Maybe this sensor was not functioning? After scoping out the really tiny ground and power pins, the third output pin responded resoundingly to a test magnet, dropping from 2V to 0V… no dice. I needed to go deeper, to the board itself.

Looking at the service manual’s troubleshooting flowchart for “Internal Memorycard” on page 128, the next step was to scope VMMC, or the voltage supply from the mainboard to the card itself. The flowchart suggests measuring from C5201… where’s that? Just check page 48 for the board layout!

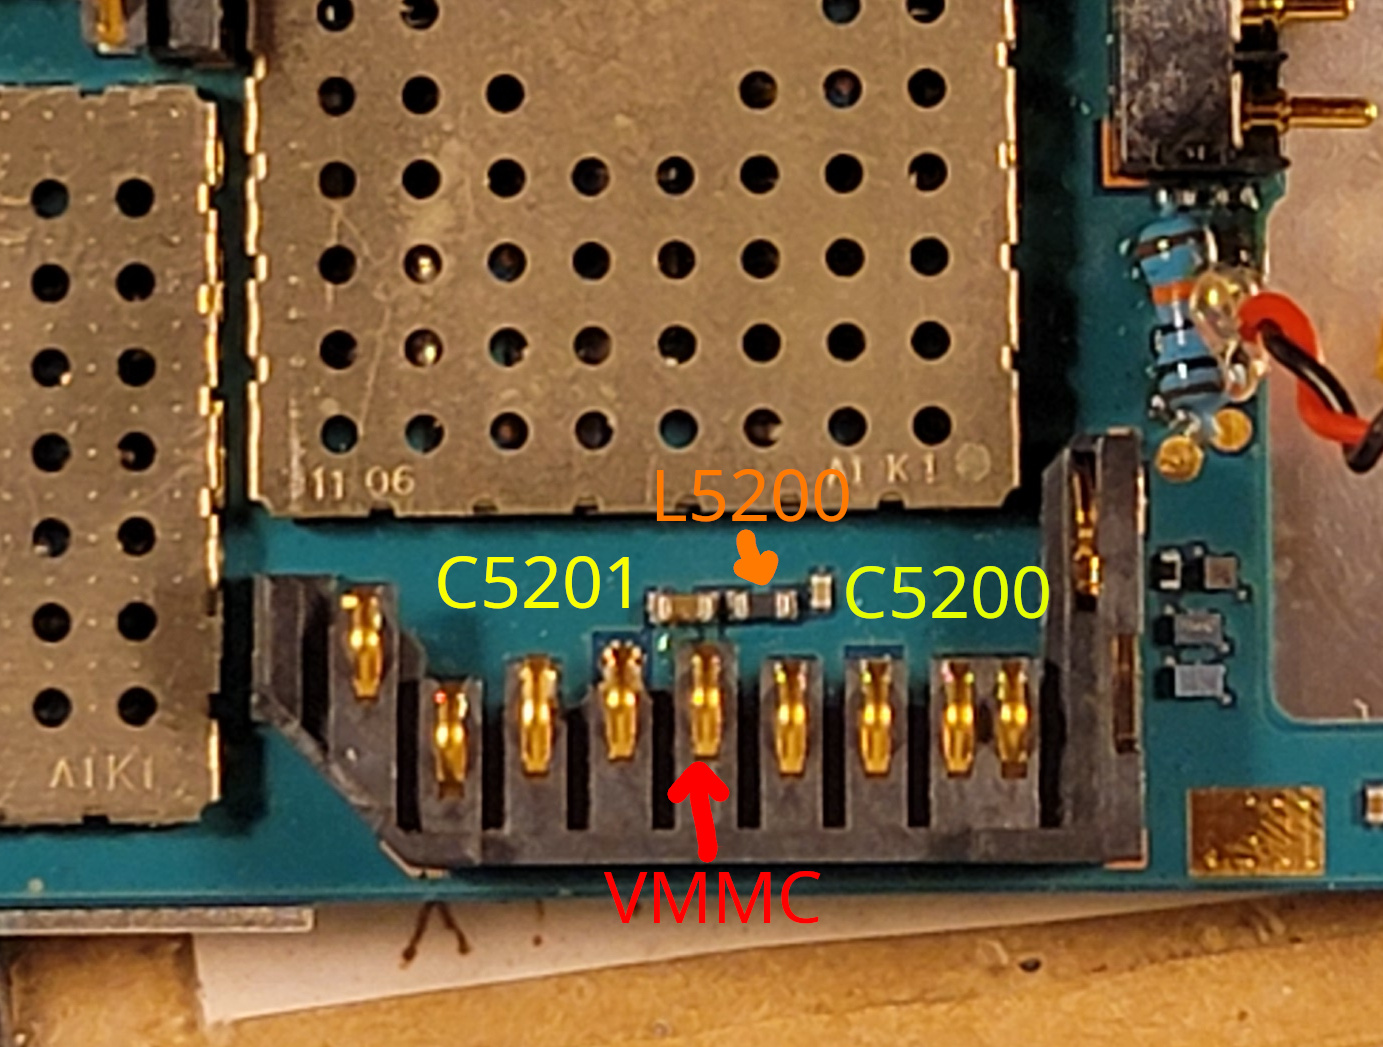
Ughh… placing the SD card in the connector covers up the capacitor of interest… I decided instead to just interpose a thin wire on the VMMC spring contact instead. Upon jiggling the test magnet that I placed over the Hall Effect Sensor That revealed that the mainboard was actually sending power to the newly detected card! But it was peaking at 1.1V… the heck?

Time to drill down into the schematics on page 207. I saw that C5200, L5200, and C5201 were connected quite simply to each other and to ground. Verifying this with my probe was simple, so last was the connection from this power line to the SD card connector pin itself, which immediately rang alarm bells as no connection was detected - Bingo! Perhaps over time, mechanical stressing of the pin weakened its connection to the mainboard.
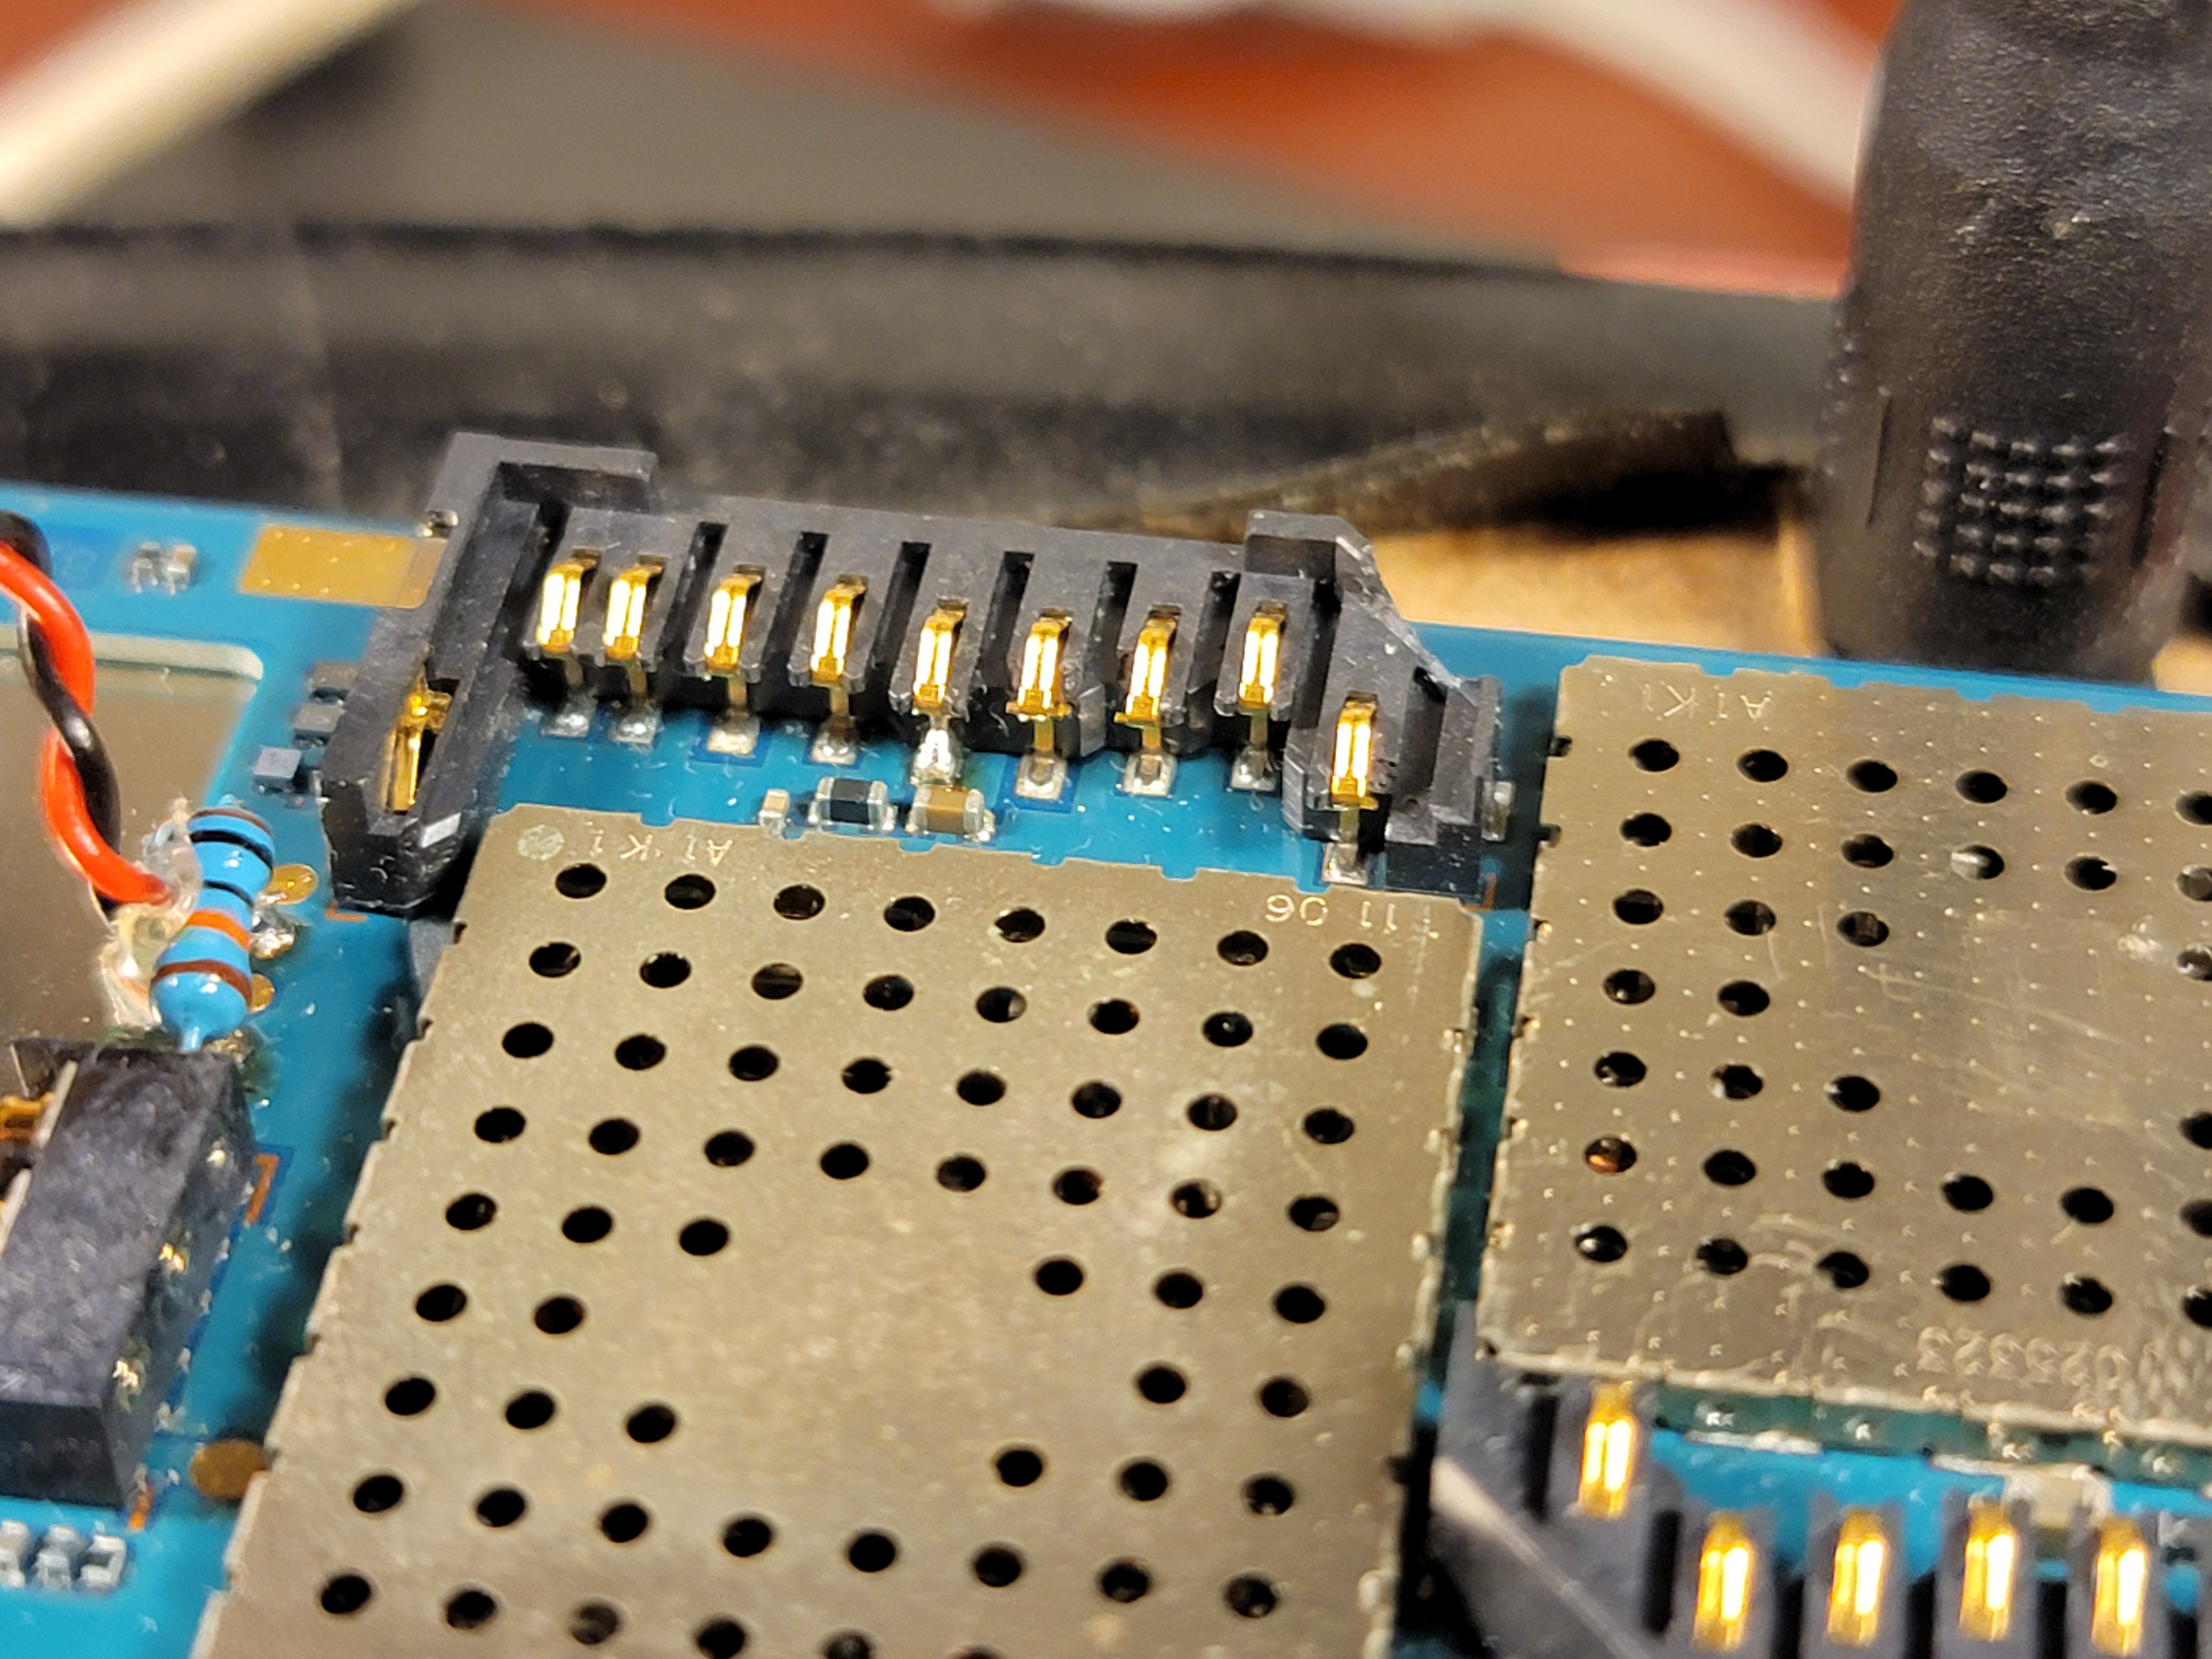
Doing a quick reflow job with my iron in a tight spot (hot air + 15 year old plastic connector = probably not good), and doing the same magnet trick with the SD card held in to the connector, I was greeted with: “Memory card available”.
Pimping your N800
With all the hardware changes complete, all that is left is software. I recommend the guide on maemo.org, although the accompanying point-and-shoot-camera videos are pretty garbage. It’s understandable, I suppose, these were the late 2000s.
Late 2000s… and this year is 2024… aw heck - it’s already been 15 years?! Who is still going to use this device anyway?